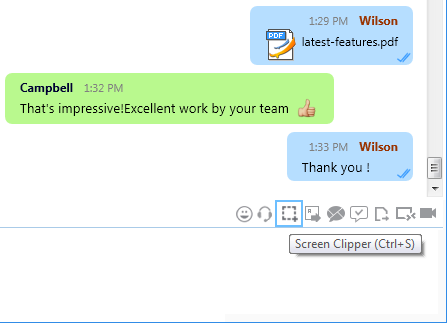
Screen Clipper allows you to take the screenshot of a selected part of your window or desktop. You can apply the changes to it based on your business needs and then save it or send to your colleague instantly.
To capture a snip
You can capture a snip, by following the procedures given below.
- Hover your mouse over the right headed arrow, on the right corner of the chat box.
- Click Share Desktop/Screen > Screen Clipper.
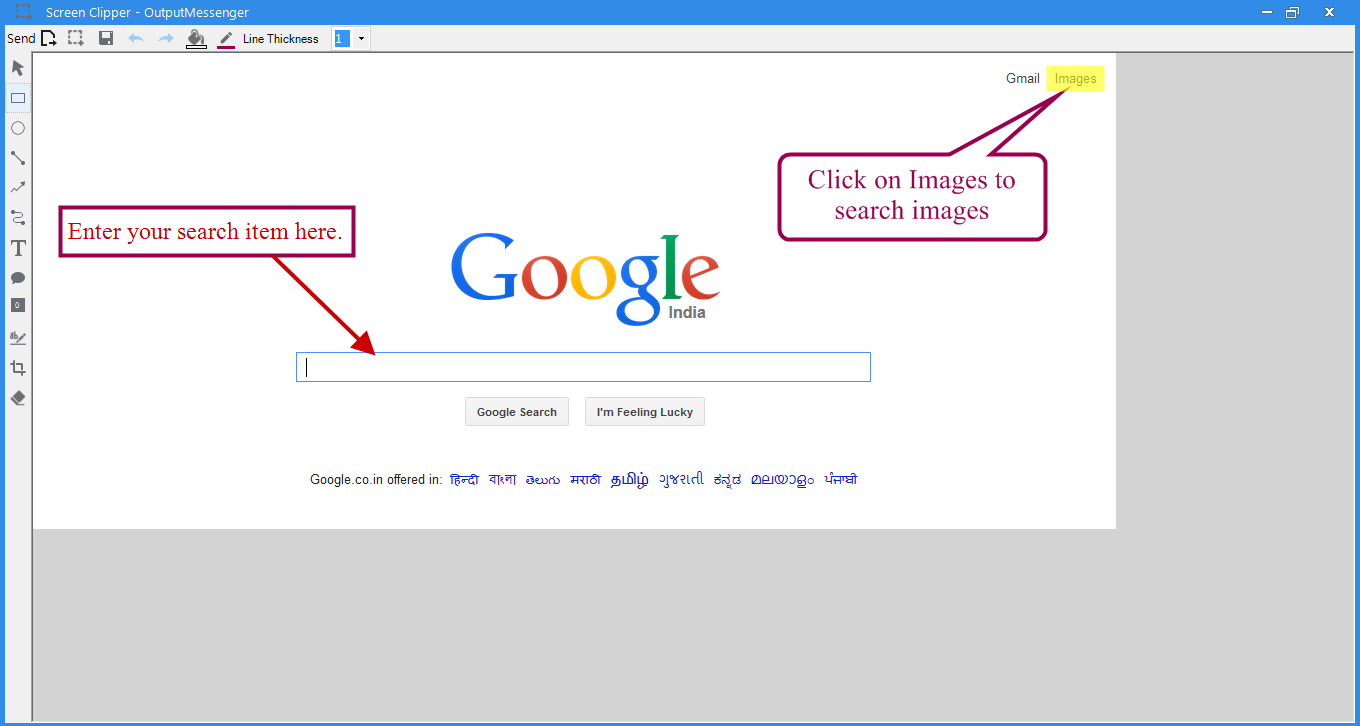
- Crop the screen, you want to share. The captured image will be automatically pasted in Output Messenger’s clipboard (as like the following screen), where you can apply your changes.
- Click Save (for future use) / Send (to pass it to respective receiver on whose window you chosen the clipping tool).
You can choose either of the two following options :
- Desktop.
- Window.
Tools in Screen Clipper
With Screen clipper, you can edit the screenshots handily with the following tools.
- Quick Access Tool :
- New
 : Opens new capturing area.
 - Save
 : Saves the changes in screenshot.
 - Copy to Clipboard
 : Copy the clipped screen to your Clipboard.
 - Undo
 : To reverse the executed action.
 - Redo :
 To execute the reversed action.
 - Send
 : To send the clip to the user.
- New
- Formatting Tools:
To add different shapes in your image, you can use formatting tools.- Rectangle

- Circle

- Line

- Arrow

- Draw Free hand

- Rectangle
- Editing Tools :
- Selection
 : To select the already executed options.
 - Text
 : To enter text in the picture.
 - Chat Balloon
 : To represent conversation.
 - Numbering
 : To add numbering.
 - Highlighter
 : To highlight the text.
 - Crop
 : To cut the picture which makes the selected portion only will visible in your image.
 - Erase
 : To erase areas in your image.
 - Fill Color
 : To fill color for the shapes.
 - Line Color
 : To change line color for all shape.
 - Line
 thickness : To change line thickness, change here.
- Selection

