This section describes how you can manage your user departments. It includes that how to add, edit and remove the departments.
Page Contents
Access the Departments Area
- In Server Manager, Click Departments icon in sidebar or menu Tools > Departments
Operation to Perform
Adding a Department
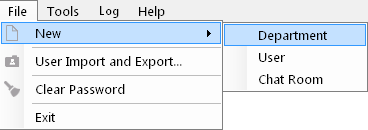
1. Click File > New Department or Right-click the departments listing grid, choose the New Department option.

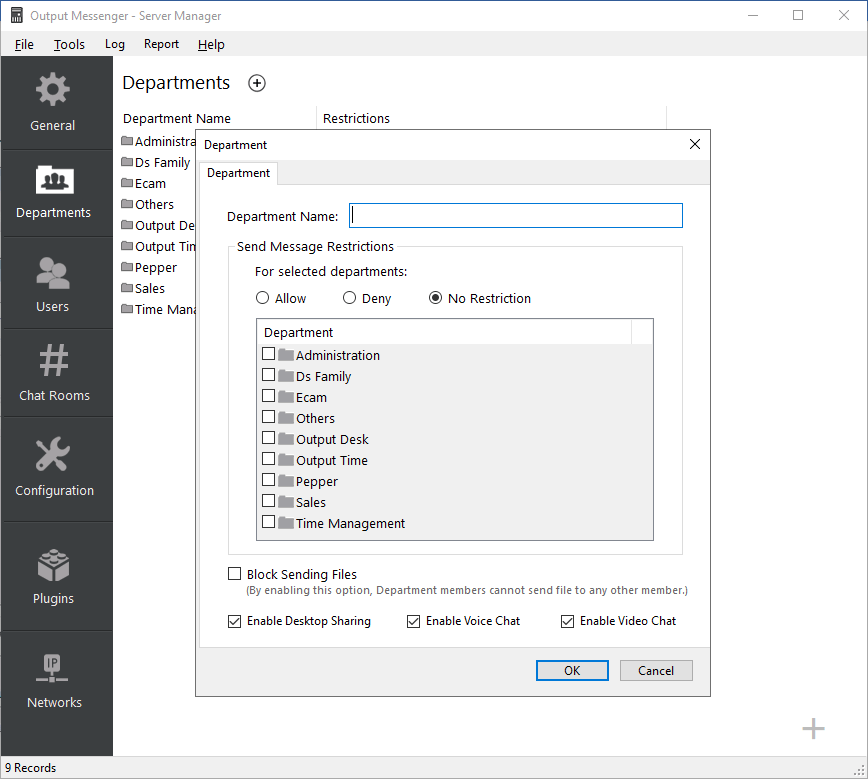
2. The Department window is displayed. Provide a unique Department Name.
 3. Send Message Restriction:
- Allow – Department Members can send messages to the members of the selected department only.
- Deny – Department Members cannot send messages to the selected departments. They can send messages to all other departments.
- No Restriction – Department members can send messages to ALL department users.
Tip: To block sending messages to the same department members, in Department Edit screen, deny by selecting the same department.
4. Block Sending files – By enabling this option, all department members cannot send a file to any other member. But they can receive file from other users.
5. Enable Desktop Sharing – Enable this option so that selected department users can use desktop sharing feature.
6. Enable Voice Chat – Enable this option so that selected department users can perform voice call with other users.
7. Enable Video Chat – Enable this option so that selected department users can perform video call with other users.
Click Ok. The department is created.
Editing a Department
In the departments listing grid, right-Click a Department Name, choose Edit Department from the context menu.
Deleting a Department
Select the Department to be deleted, Right Click and choose Delete department from the context menu.
RELATED TOPICS