Add & Configure Assistants
Connect an AI Assistant to Output Messenger and chat with it right inside your message
window. You can connect any OpenAI-compatible provider — cloud or local.
Add an assistant
- In the User List, find the Assistants group near the bottom.
- Click the + button next to the Assistants heading to open Assistant Settings.
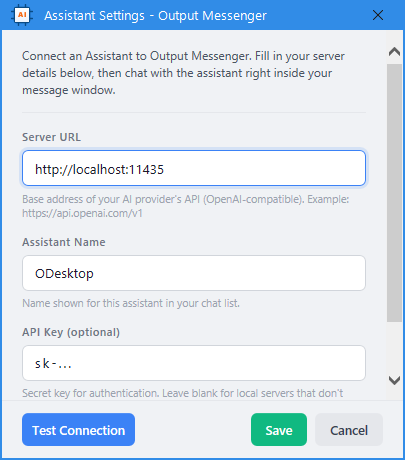
Enter the connection details
- Server URL (required) — the base address of your AI provider’s API (OpenAI-compatible), e.g. https://api.openai.com/v1. For a local model, use its local address.
- Assistant Name — the name shown for this assistant in your chat list, e.g. ODesktop.
- API Key (optional) — the secret key for authentication (sk-…). Leave blank for local servers that don’t require one.
Test and save
- Click Test Connection to confirm the details are correct.
- Click Save. The assistant now appears under Assistants in your User List.
Start chatting
Select the assistant and type your request like a normal chat — for example,
“Write a professional follow-up email to a client.”
Tip: To change an assistant’s settings later, open it and click the gear (⚙) icon in the chat header.
Example: the ODesktop Assistant
ODesktop is an example of a configured assistant — a desktop assistant you
chat with inside Output Messenger. It goes beyond answering questions and performs real tasks
on your computer. Just describe what you need in plain language.
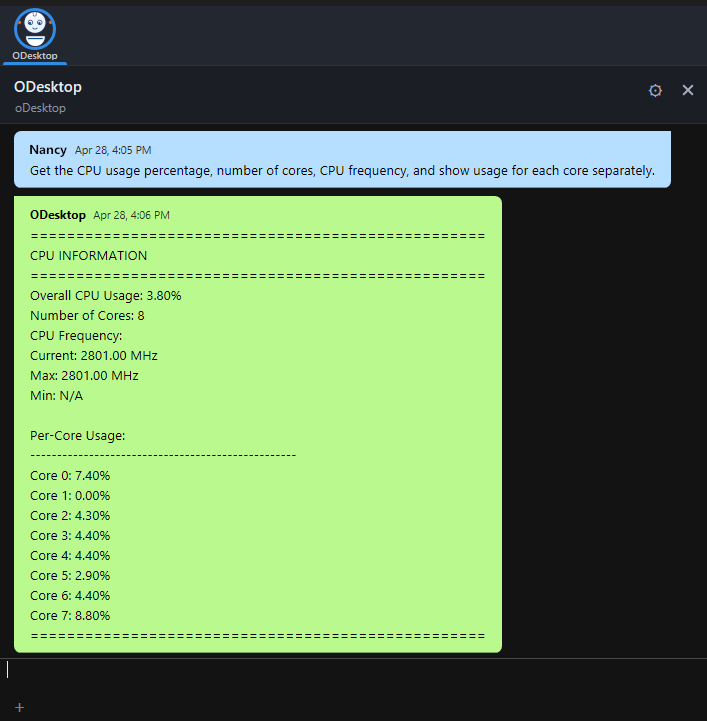
What it can do
- File operations — search, move, copy, and rename files.
- System monitoring — check CPU, memory, disk, and running processes.
- Document creation — generate reports, letters, and notes.
- Web scraping — extract and save data from web pages.
- Image manipulation — resize images and extract text (OCR).
- …and more.
Example requests
- Find all .pdf files in my Documents folder and move them to a “Reports” folder.
- Check the current CPU, memory, and disk usage of this computer.
- Write a professional email to a client confirming their installation is complete.
- Extract all text from the image C:\Users\Asus\Desktop\logo.png.
- Resize this image to 300 × 300 pixels.
Tip: Be specific — include file paths, folder names, or sizes so ODesktop knows exactly what to do.

